Plungie Logo

HIDE KIT - INSTALLATION GUIDE

Bedding-them-in

Thank you for choosing a quality HIDE product.

Below is some important information regarding installation best practices. There is also a link to a 5-minute video, stepping through the installation of a HIDE Skimmer Cover, and replacing an old round plastic lid with a new HIDE flush cover. I think you will find this video very helpful.

Covered below:

  • What's in the kit
  • Installing the Edge Protector
  • Assembling the Inlay Cover
  • Video link
  • Download these instructions link
SSA Logo

Exceeding Safety Standards 

HIDE® Skimmer Lids and Covers conform to swimming pool Safety Standards.
Please keep the Safety Key away from the lid, in a safe place, so children cannot open the HIDE Cover.

Purchasing Instructions

Plungie-purchase-instructions

What's in your kit

HIDE-Skimmer-Lid-only

Inlay Cover

A tray that holds the inlay material, e.g. tile, paver, decking, turf, cement. You choose the kit that suits the thickness of your inlay material.

Single Key model or double key model.

HIDE-Skimmer-Lid-Edge-Protector

Edge Protector

This frame is inserted into a recess within the landscaped area or pool bedding. It protects the coping/surrounds from chipping/breakages and holds the Inlay Cover in place so it sits perfectly flush with the finished surface.

This piece may need earthing, so consult with your licenced electrician ahead of time.

Height-Adjuster-800px

Height Adjuster

Provides 5mm (3/16”) extra height if inlay material is not thick enough to achieve a flush finish with the top of the Inlay Cover.

Suits both single key and double key models.

New-Replacement-Safety-Key-Latest-Key

Safety Key

DO NOT LEAVE IN THE Cover! Pass to the Homeowner.

Single Key model Kits 10, 20 & 30mm  
- USA (0.4", 0.8" & 1.2")
Double Key model Kits 40, 50 & 60mm 
- USA (1.6", 2.0" & 2.5")

Adhesive-x-1-700px

Adhesive

For use when assembling the Inlay Cover.
HIDE specially formulated this adhesive to effectively bond your inlay material to the Stainless Steel tray. Apply in a fashion that enables any moisture to run out of the 4 drain holes.

Installation-1080

Documents

Included is a printed copy of these installation instructions or a QR Code linking you to this page. Also, a Homeowners Manual (or link to it) needs to be passed on to the end user after installation.

recess-aroung-the-skimmer
setting-the-Edge-Protector
ed_landscapes-1080

Three helpful tips:

Please read the following

  1. It is important to exercise caution and prevent any acid or chemical wash solutions from coming into contact with the Stainless Steel HIDE product.
  2. Always use an expansion gap filler around the Edge Protector (as per instructions) to allow for expansion.
  3. Clean your stainless steel product with fresh, soapy water and remove any foreign matter to prevent staining.


Concrete Kits

HIDE-Concrete-Cover

Inlay Cover for Concrete

This frame is inserted into a recess within the landscaped area or pool bedding. It protects the coping/surrounds from chipping/breakages and holds the Inlay Cover in place so it sits perfectly flush with the finished surface.

This piece may need earthing, so consult with your licenced electrician ahead of time.

Lugs-1080

Key Slot Formers & Lugs

All Inlay Covers 40mm (1.6") and deeper, can be used as a concrete wet-pour lid. 
Australia - You will order a HCON Kit.
North America - All Kits 1.6" and above will have these plugs included in the standard kit, giving you the flexibility to snap them in if required.

Installation-1080

Documents

Included is a printed copy of these installation instructions or a QR Code linking you to this page. Also, a Homeowners Manual (or link to it) needs to be passed on to the end user after installation.

HIDE-Concrete-Collar-bedding
HIDE-Concrete-Collar-Installed
HIDE-Concrete-Collar-Web-1080px

Assembling the Inlay Cover

Fitting the Tile/Stone Inlay

Install 1

Cut the tile inlay to size.

  • If the stone has a bevelled edge, cut each edge square for a better finish.
  • Allow at least 1mm on each edge for expansion and contraction of the steel.
Install 2

Mark and cut the keyway at centre

  • Ensure the keyway is positioned on the tile edge, which will be closest to the pool. Grind a slot 6mm x 25mm (1/4” x 1.0”)
  • Check that the key fits the keyway before gluing the tile into the Inlay Cover.
  • NOTE: Two key models require two key ways.
Install 3

Clean and dry the cut tile

  • Failure to complete these steps may result in a weak adhesive bond.
  • You must ensure materials are fully dry before bonding, especially in cold weather.
Install 4

Calculate the amount of adhesive required and if the Height Adjuster needs to be used

  • Measure the difference between the internal height of the HIDE Inlay Cover that you have purchased and your Inlay material thickness.

  • If the height difference is under <=3mm (1/8”), apply 5-7 beads - 5-8mm (5/16") wide.

Install 5

Calculate the amount of adhesive required and if the Height Adjuster needs to be used

  • If the height difference is over >3mm (1/8”), use the supplied height adjuster (H) in between two layers of adhesive (as illustrated).

  • Avoid placing adhesive within 10mm (3/8”) of keyway and drainage holes.
  • Ensure the adhesive supports each corner of the inlay material.
Install 6

Flip the installed tile in the Inlay Cover over on a flat surface

  • On a flat surface, flip the lid and inlay material and press down to compress the adhesive and form a secure bond.
Install 7

Press down until it is flush

  • Ensure a flush finish with the tile inlay and top of the lid.
  • Leave for 15 minutes (longer in cold weather) to let the adhesive stiffen before turning back the right way up to position the tile's spacing accurately.
Install 8

Position the tile before it sets

  • Turning the cover the right way up to position the tile's spacing accurately.
  • Let the adhesive set for 24 hours.
  • The adhesive should not be used in temperatures below 5ºC (41ºF) and above 40ºC (104ºF).
  • Curing time will be affected in harsh environments.
    - Curing time is longer in cold weather.
    - Cure in the shade in hot weather.
check-depth
cut-keyway
add-glue-to-lid

Installing the Edge Protector

Pool coping preparation

coping 1

New Pools

  • Set Depth - when laying the levelling bed. Provide a recess for the edge protector so it will be flush with the top of the installed tile. 
  • Note: The Edge Protector is deeper than your tile inlay
  • Earthing - Ensure earthing wires are installed by a licensed electrician, as per regulations and attached to the Edge Protector.
coping 3

Existing Pools

  • Cutout - Mark the outline for cutting surrounds and cut depth to match the selected edge protector and a mortar bed.
  • Ensure the edge protector is centred over the skimmer to mark the cutting area.
  • Allow for 1-2mm (1/16”) clearance on all sides as an expansion gap.
coping 6

Leave an Expansion Gap

  • The Edge Protector may be left loose on its mortar bed or filled with an expansion joint gap filler to allow for expansion and contraction of the steel.

coping 2

Earthing for all pools

  • Ensure earthing wires are installed by a licensed electrician, per regulations and attached to the Edge Protector.

coping 4

Add mortar

  • Remove any debris from the recess and add a mortar bed so the Edge Protector can be inserted and sit flush with the top of the installed tile.

coping 5

Position the Edge Protector

  • Ensure the Edge Protector frame sits level with surrounds and excess mortar is removed.
  • Allow the mortar to set.
check-depth
cut-keyway
add-glue-to-lid

tile-deck-modified-1600

The new standard in poolside finishes

HIDE products are designed for durability and safety. However, there are a few important points to remember when:
having a HIDE product installed; and
using and maintaining a HIDE product

This document explains the best practice to:
ensure safe HIDE use practises
ensure correct care and maintenance of your product

Please read this document with the HIDE warranty below, and bookmark this page for future reference. Remember - misuse, unsafe practices, or incorrect procedures may void the HIDE warranty.

If you have any queries, all our contact details are below under the Contact details tab.

HIDE-Logo-Exterior-Covers 2
Plungie Logo

Grab a digital brochure

HIDE will send a brochure to your inbox now.

HAC306-10-square-1080
hide-access-cover-lifting
Concrete-stack-&-insitu

SAFETY FIRST

child fingers

Ban little fingers

Never allow children to operate the HIDE Safety Key or the lid itself. This is a job for adults!

remove key

Keep them separated

Never leave the HIDE Safety Key in the Lid for any reason. The key is not specified or designed to remain in the lid.

turn off

Turn off first

Never open a skimmer with the pump running.

remove lid

Wait to access

Remove the lid completely before accessing the uncovered recess.

do not carry

No weight bearing

Do not carry the lid with the Safety Key. This may damage the key.

unattended

Child safe

Do not leave nearby children unattended while the lid is removed.

fingers

Protect fingers

Ensure fingers and toes are not under the lid when lowering.

safe storage

Safe storage

Always return the Safety Key to a child safe, secure stored location.


SAFE OPERATION

operation1
operation2
operation3
operation4

Insert the key.

Insert the Safety Key and turn it to 90° so it locks onto the back of the lid. Pull the key upwards to lift the lid edge to a 90° position.

Remove the lid with your hands.

Remove the lid with your hands, not the key.
Remove keys and store them away from children.

MAINTENANCE IS REQUIRED

ENGLISH - Care & Maintenance + Warranty

Skimmer Lids Pty Ltd Product Quality Guarantee

You have purchased a quality product from Skimmer Lids Pty Limited ABN 52 169 398 636  (“Skimmer Lids”). please open and read the care and maintenance advice and your warranty details.

SPANISH - Cuidado y Mantenimiento + Garantía

Garantía de Calidad del Producto de Skimmer Lids Pty Ltd

Usted ha comprado un producto de calidad de Skimmer Lids Pty Limited ABN 52 169 398 636 (“Skimmer Lids”). Por favor, ábralo y lea los consejos de cuidado y mantenimiento, así como los detalles de su garantía.

No Acid Wash

Warning

Do not allow acid or chemical wash solutions to contact the HIDE product.

Beware of Acid and chemical wash.

Pool owners may look at professional acid washing if their pool suffers from algae buildup and water discolouration. Similarly, homeowners may clean their outdoor pavers or tiles with a chemical wash. If embarking on either option, please be aware that the Stainless Steel HIDE components must not come into contact with any acid or chemical washing solutions.

Chemical contact with most pool and paving cleaning solutions will rapidly affect the surface finish of the stainless steel HIDE components. The resulting rust will damage the lid inlay and potentially the structural integrity of the HIDE lid itself. Alternatives are available in the form of “Green Acid Replacement.”

General care.

It’s a good idea to regularly open your HIDE product and check for and remove any leaf litter or debris which may have gathered inside the HIDE Edge Protector.  If not removed, the debris may cause the HIDE lid to become loose or to sit unevenly.

Check regularly to ensure the HIDE product is fitting well and is sitting evenly in its recessed area.

Remove any 'tea staining'.

Occasionally you might notice some cosmetic discolouration on the stainless steel components of the HIDE product, often known as “tea-staining”. Although HIDE lids are made of 316L marine grade stainless steel, within water environments, it’s normal for visible surface rusting to occur. The issue, if treated whenever noticed, will not affect the structural performance of the HIDE product.

Typically the tea staining will form on the underside of the HIDE lid, where residues and salt deposits gather. To clean, all you need is a stainless steel scourer, soapy water and a little elbow grease. Just be sure to use the scourer parallel to the grain direction of the HIDE lid. Rinse thoroughly when done.

Please be aware that if the surface staining is allowed to build up over time, possible rust bleeding may leach onto the HIDE lid inlay or surrounding paving.  This is not a fault of the lid and is completely avoidable with occasional cleaning.  If allowed to occur over a prolonged period, the leaching may not be able to be removed.

Please note that rain washing is not sufficient in most applications.

All acid and chemical washes will cause discolouration of the stainless steel.

Acid type, concentration, and contact period will vary the level of deterioration of the stainless steel.

Remove any discolouration immediately, as per our ‘Tea Staining’ instructions.

instructions - Your product may have
surface damaged, the warranty will be void.

Always make this information available to installers and the homeowner to avoid mistreating a stainless steel product.

Use Green Acid Replacement

It is recommended that you always use a Green Acid Replacement, which will not affect the stainless steel, better for your stone and tiles and the environment.

Here is an example of a green acid replacement product:  https://diamach.com.au/shop/specials/guardit-gar-green-acid-replacement-1-litre/

Tea Staining is natural and can be scrubbed off.

HIDE components are made of 316L marine-grade stainless steel. Although this is a very high-grade external product, it is normal for visible surface “browning” to occur (known as ‘Tea-staining’).

It should not be confused with rust; it is a cosmetic discolouration on the stainless steel surface.

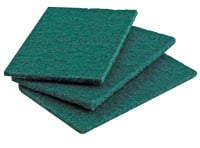
Carefully remove ‘Tea-staining’ as soon as it’s noticed with a nylon scouring pad.

Scouring-Pad


If you have purchased a HIDE Kit and lost your key, we recommend purchasing a replacement key directly from HIDE. If your key becomes faulty or breaks under warranty, we will replace it free of charge. Proof of purchase and photo evidence of the broken key is required.

We also have available, exclusively for the pool service industry a low cost ‘Service Key’, allowing pool service without disruption. Service contractors, please call HIDE direct on 07 3807 2551, speak to our lovely Anne-Marie & purchase your ‘Contractor Key.’

Have questions?

Australia
Head Office: +61 7 3807 2551
admin@skimmerlids.com.au

Australia/NZ: Gary +61 427 270 560 
gary@skimmerlids.com.au

NSW: Sarah-Jane +61 447 981 121
sarahjane@skimmerlids.com.au

VIC: Brett +61 499 260 254
brett.dodge@skimmerlids.com.au


North America

North America Sales & Operations Manager: Sam - 949 942 4905
sam.hazell@skimmercovers.com

East Coast Sales Manager (USA): Jacob +1 469 544 1325
jacob.smith@skimmercovers.com

Q: Are HIDE Skimmer Lids Safe?

A: All HIDE Skimmer Lids conform to the Australian standards of “a child-resistant skimmer lid”; the Hide lid, regardless of weight, “cannot be lifted off”. The HIDE Skimmer Box Lid is simple, reliable & provides easy access with a HIDE safety key as a separate lifting device. When the HIDE lid is placed back in location with the key removed, the lid immediately becomes relocked.

Q: Should I Earth the HIDE Skimmer Lid?

A: Steel items within arm's reach (1.25m) from the pool may need to be earthed. There are many considerations, but it is safe to say that the HIDE Recess Frame should be earthed. The Lid doesn't need to be as it's removable.

Q: What maintenance is required?

A: Your New HIDE Skimmer Lid does require cleaning on an ongoing basis. Use soapy water and wipe clean and keep free from foreign items and never use acid around the stainless steel products.

brochure-download

Subscribe for information & inspiration

Request brochures on products you are interested in or for purchasing advice.